在此分享,將Seattle 改成台北的教學
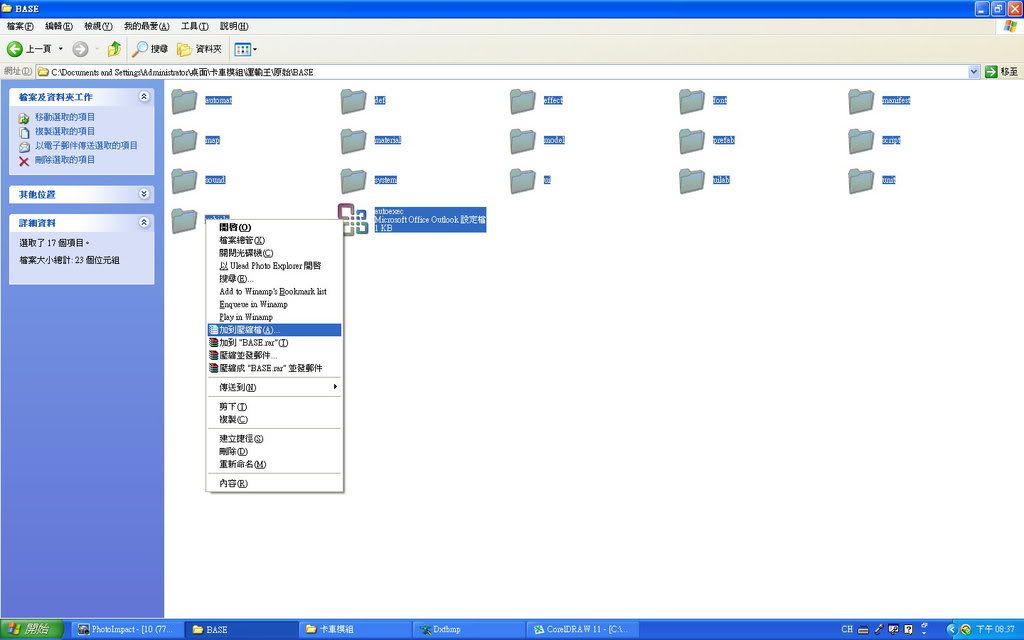
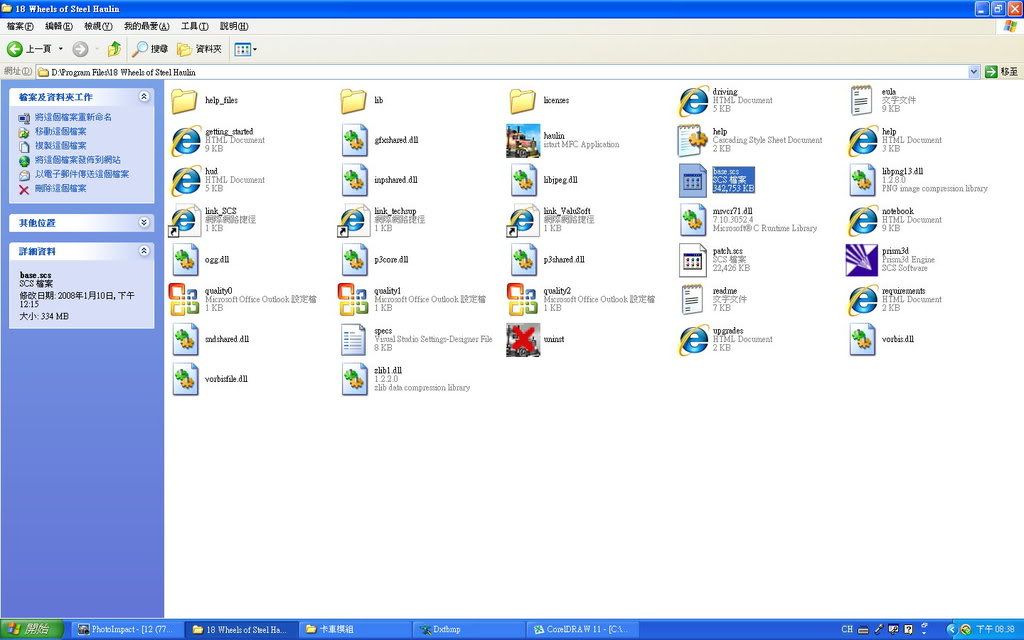
先將base.scs 解壓縮
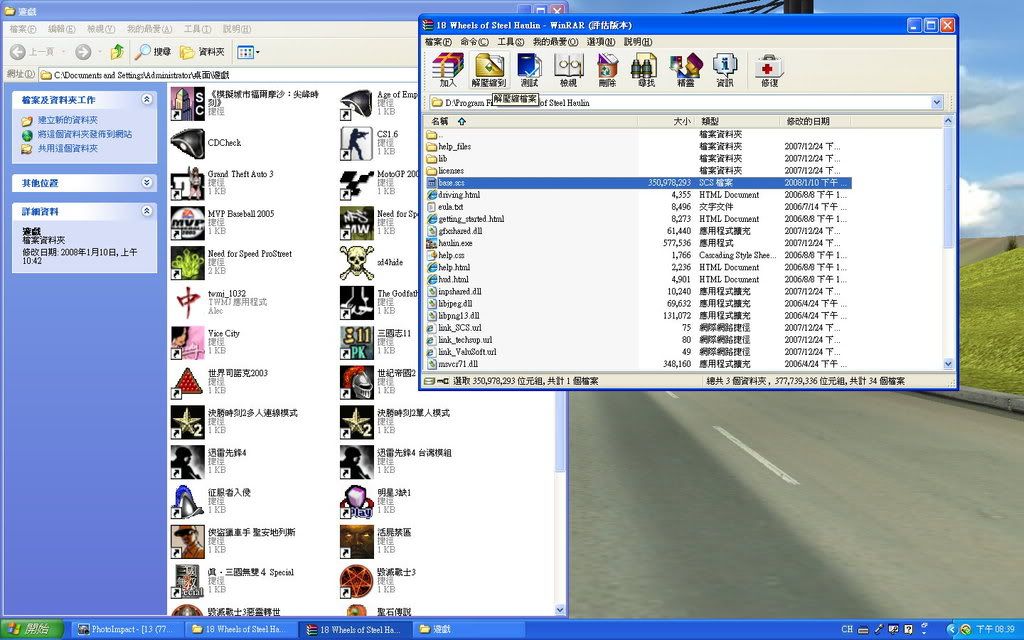
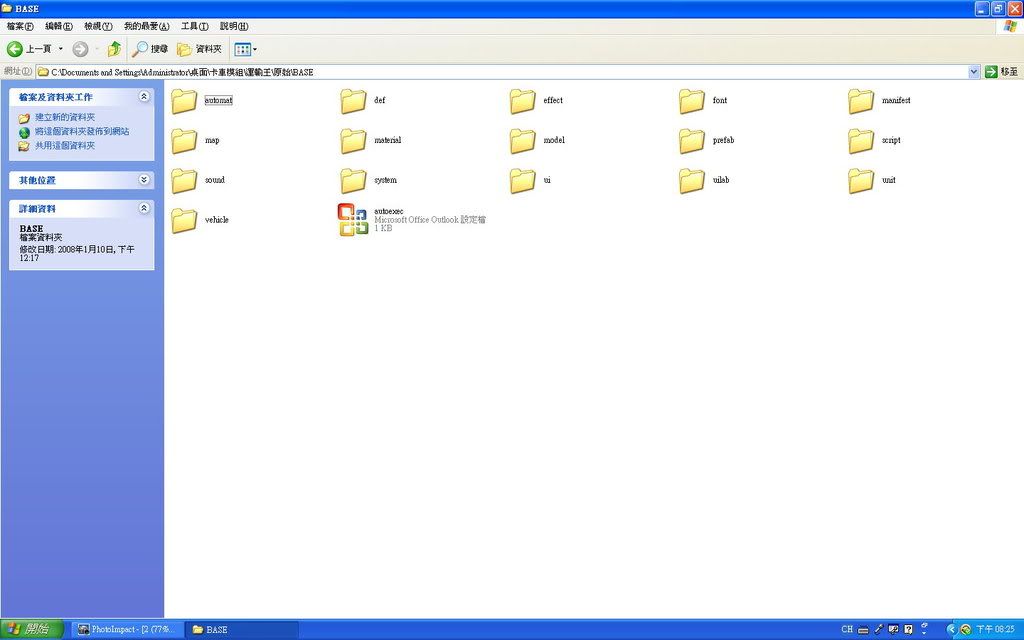
解壓縮後有許多檔案
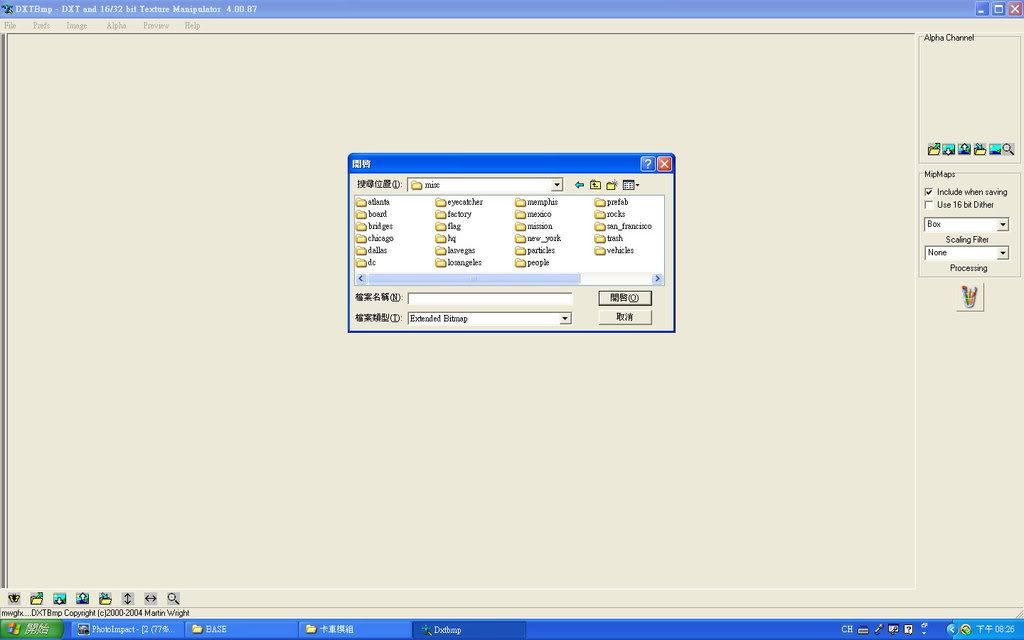
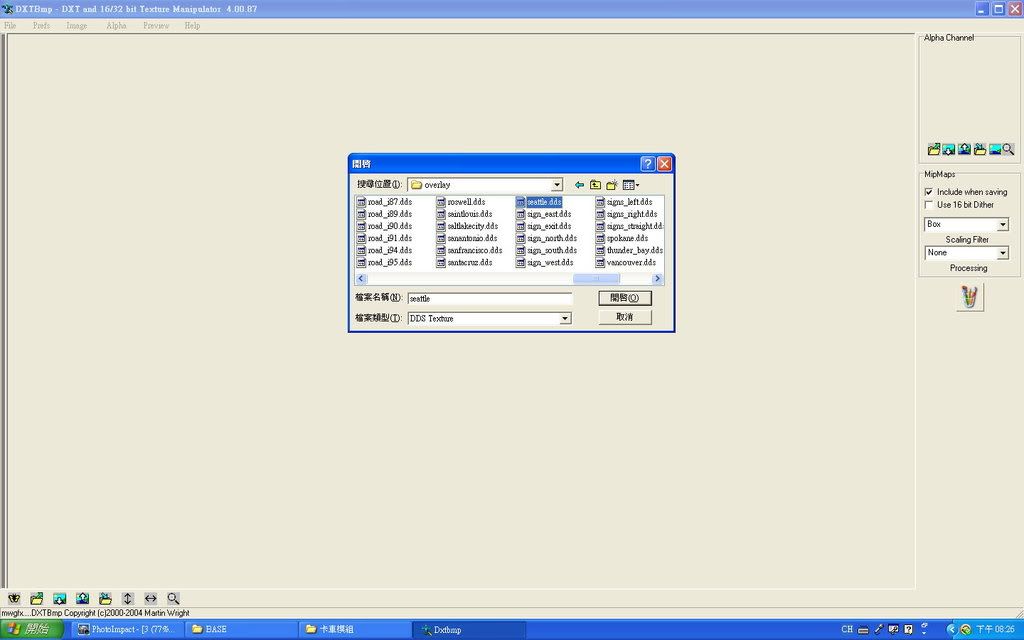
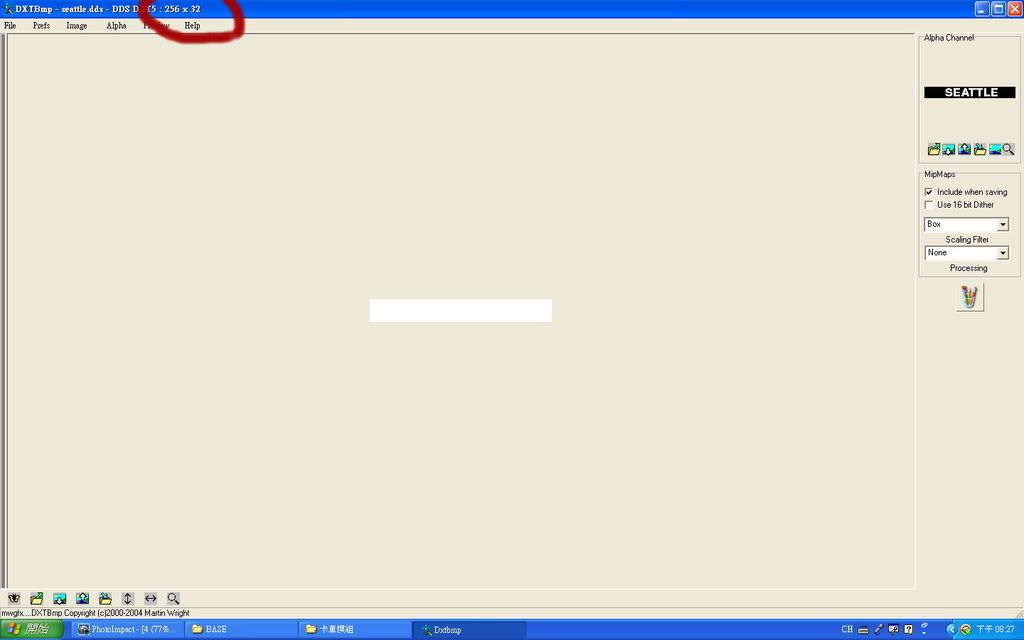
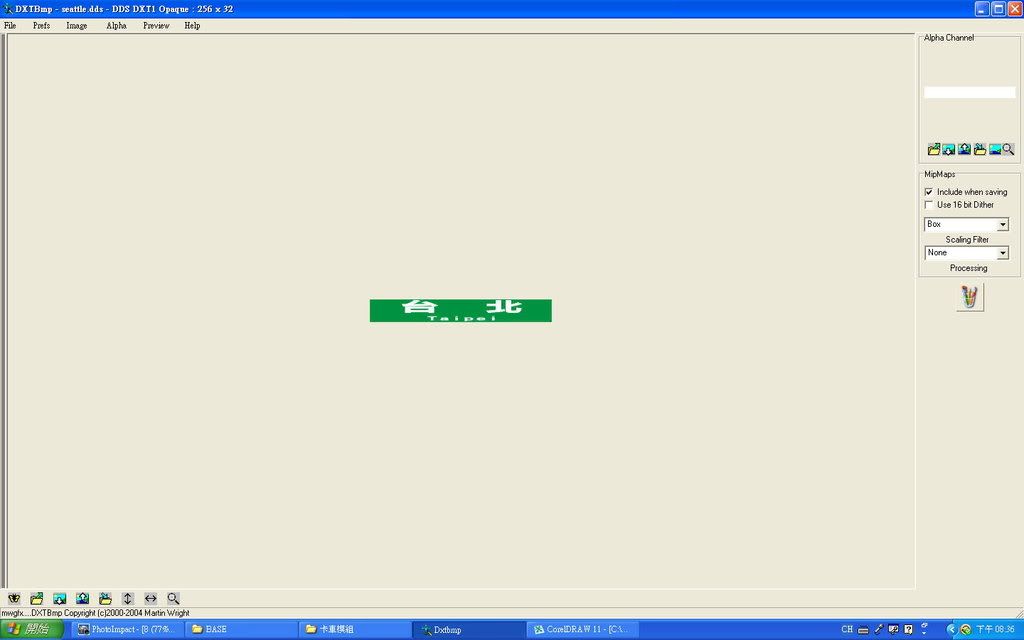
開啟DXTBmp,進入解壓縮後的資料夾,尋找 model \ sign \ overlay 裡的 seattle.dds 這個檔案並開啟
我們可以得知原本seattle 它的大小為 256*32 (這很重要,尺寸絕對不能錯)
接著開啟繪圖軟體,我是利用 COREL DRAW 11,畫出此圖形
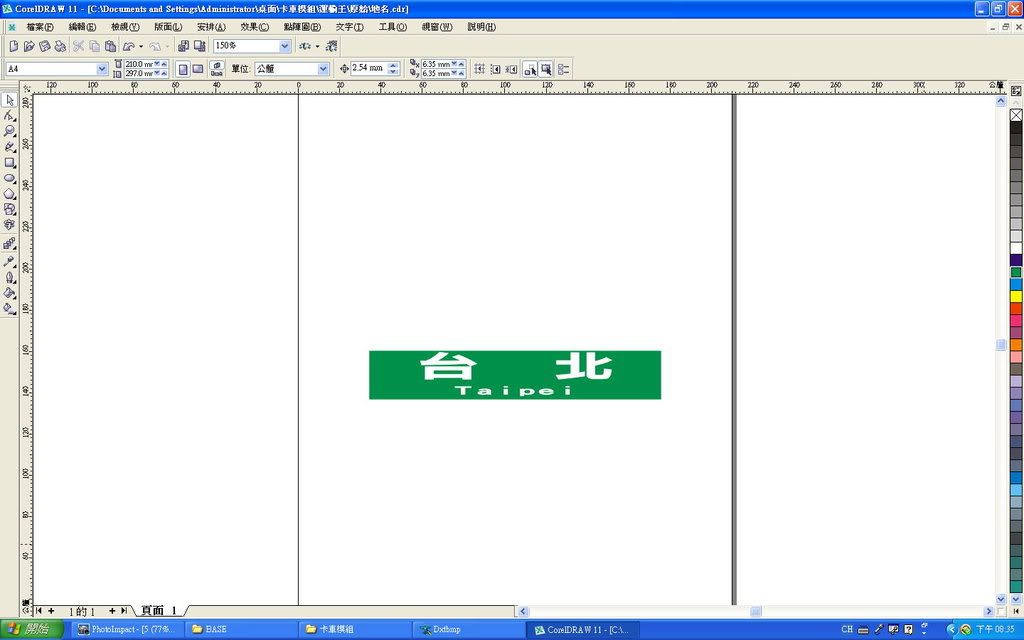
並存檔成BMP圖檔
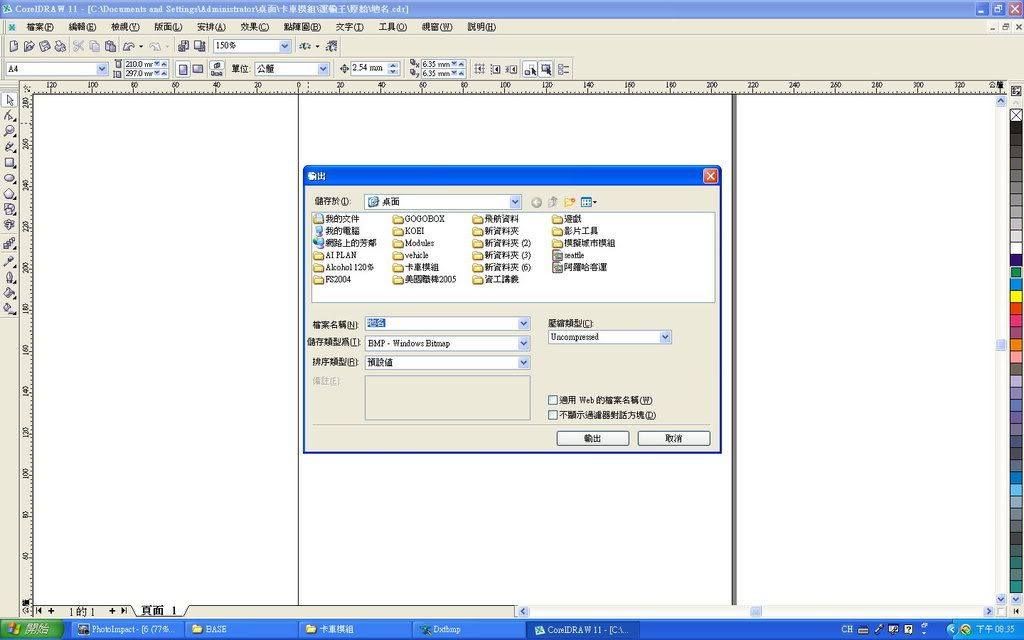
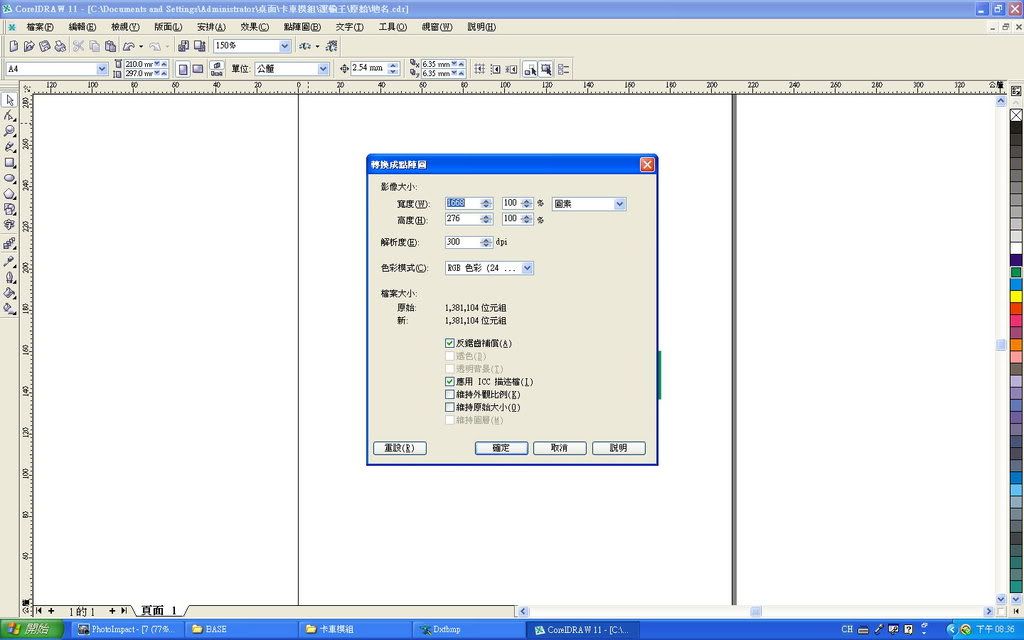
關鍵!圖素一定要改成256*32
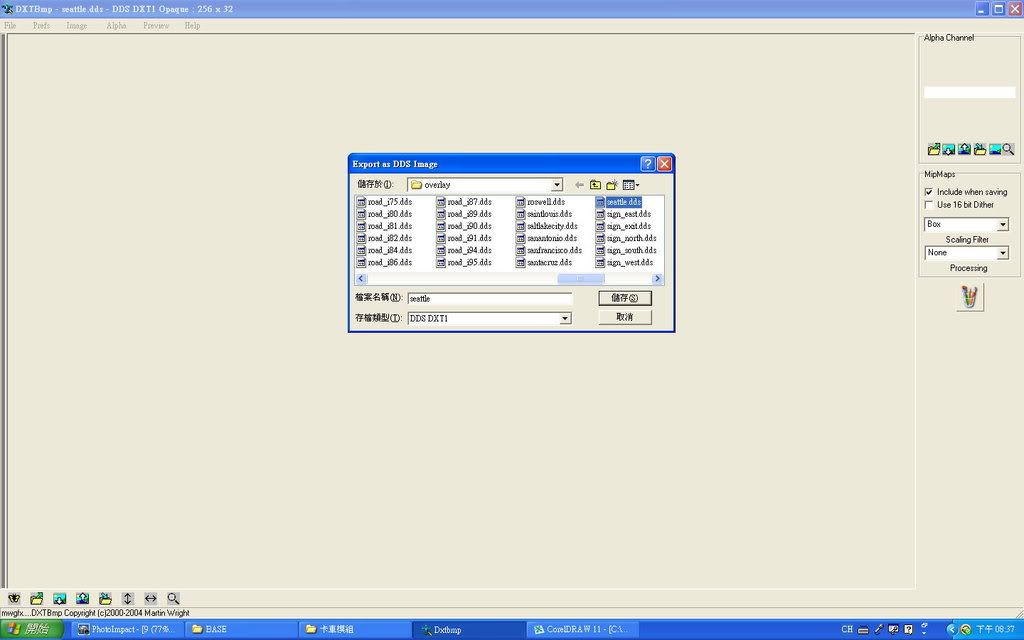
之後用DXTBmp把剛存檔好的BMP打開
把它另存成 dss 並覆蓋原本的 seattle.dss
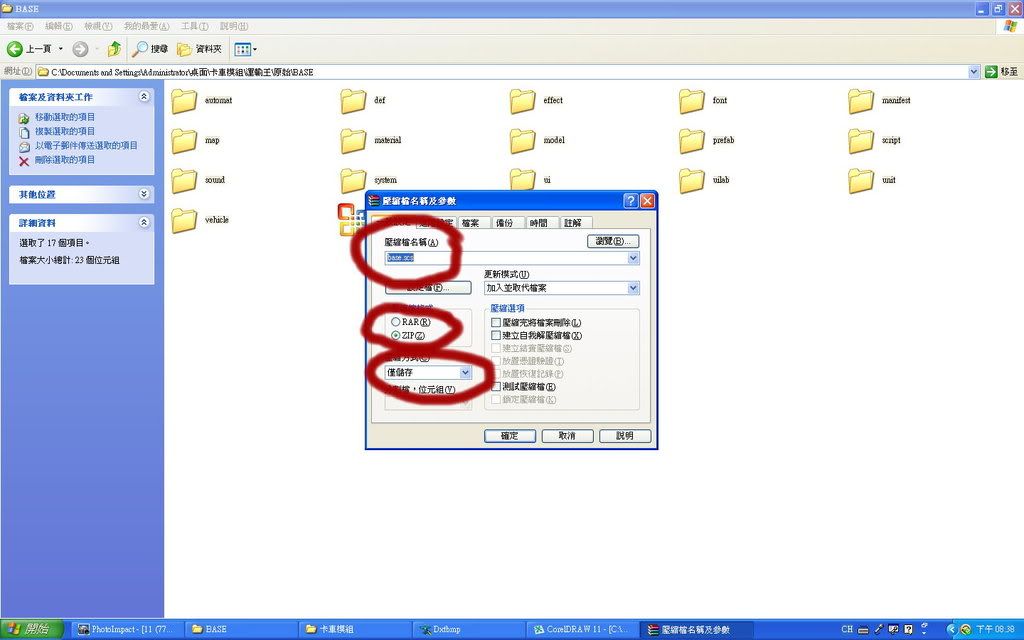
之後將整個base重新壓縮
解壓縮名稱請寫 base.scs 類型請改 ZIP 儲存方式改成僅儲存
放回目錄,開始遊戲,隨便找一個寫有seattle的指示牌,就會改變喔
PS 記得將 model \ sign \ traffic 裡的 board.dss 修改,你可以像我一樣畫一個綠色長方形,顏色和這張圖的綠色一樣,並依照上述方法存回
台北出現了,其他的就一樣了,這樣懂了嗎
[IMG]http://i78.photobucket.com/albums/j96/f88026679/hard%20truck/c163fa2f.jpg[/IMG]
無論成功與否,請回覆一下喔,謝謝。


 English

